| We didn't want to
sit on the aluminum floor any more. |
|
The
interior is going to be one of the most time consuming things in the
car. There are lots of mechanical and electrical systems. Not
only must they work, but they must be comfortable. We probably have
about 10 to 15 hours on the pedals and they still aren't right. So
we plan on taking our time so that the car is comfortable |
|
|
|
|
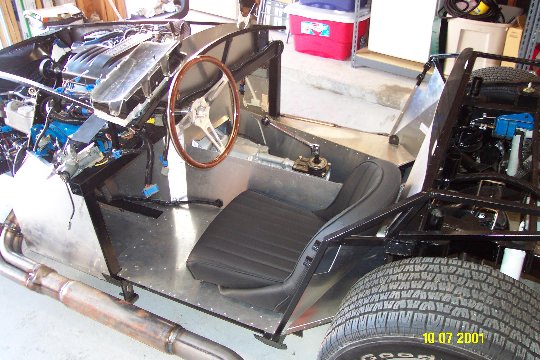
Prior to putting on the body, we test fit the drivers seat
to check the pedal and wheel positions. To adjust the pedals they
must be heated and bent or cut and welded. The wheel can be raised
or lowered by adding or removing washers under the mounting bolts. |

|
|
|
|
|
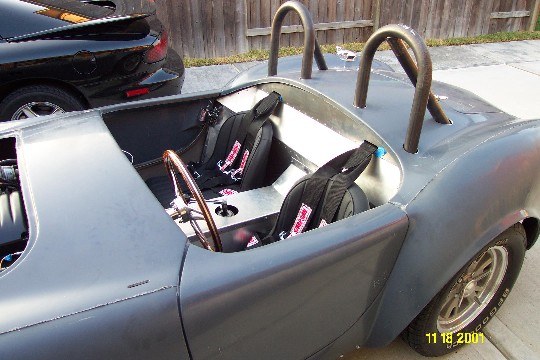
| Here are some picture of the interior
with the all the aluminum in place, seats bolted to the floor, and
the seat belts in place. The seat belts don't seem to fit smaller
passengers very well. We need to research some alternatives or
modifications. |
 |

|
|
|
|
| With the seats all they way back, there
is adequate leg room for a 6 foot tall person. Even though the shift
lever looks weird, it is pretty comfortable. |

|
|
|
|
|
| The emergency brake was a pain to
mount. You have to cut a notch in the mounting bracket so it won't
hit the seat. We messed up our first handle and had to buy a
replacement. |
 |
|
|
|
|
| The driver side seat is on tracks and it
was tough to mount them. You have to find frame tubes under the
aluminum where you can drill and tap to attach the bolts. It took us
two tries to get the right side track located correctly |

|
|
|
|
|
| The gauges and dashboard will be our
next big project. We plan on leaving it like this until after
Thanksgiving so that we can take some family members for a ride. |
 |
|
|
|
|
| This is an early test fit of the dash
before we figured out where we wanted all the lights and switches. |
 |
 |
|
|
|
| The shifter looks a little more finished
after the boot and trim ring are installed.
The dashboard has come along some more after the indicator lights and
turn signal switch are mounted. The hazard, turn signals and
high/low beam switch have been wired to toggle switches rather than using
the stock switches.. |
 |
 |
| When driving a homemade car you should
always have a fire extinguisher close by. The dash looks much better
after being covered with vinyl. |
 |
 |
|
|
|
| Prior to installing the carpet the car
was insulated with an insulation product purchased at Home Depot. I
think it is designed for water heaters, but works will in this
application. |
 |
|
|
|
|
| Here are some close ups of the driver
and passenger foot areas. I takes some work to get the carpet to
look good. It is in lots of pieces and is attached using double
sided carpet tape and screws. |
 |
 |
|
|
|
| Here is the carpet almost completely
done. The carpet along the door edge will have to wait until the car
is painted and the body is permanently installed. |
 |
 |
|
|
Home |