| Here is where
some major components come together.... |
|
We
have really been looking forward to installing the engine. The
rolling chassis is the first major milestone and the second is the engine
installation. It went fairly easily since the body was not on the
car and the engine bay is fairly wide. |
|
|
|
|
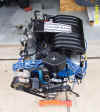
Here is the engine sitting on the stand. It has all
the major components already installed and most of the
wiring. |

|
|
|
|
|
| The engine has been reunited with the
transmission. This was fairly easy to do with clutch alignment
tool. There are 6 bolts that hold the engine and the transmission
together. I hope we tightened them enough! |
 |
|
|
|
|
| We first had to raise the engine high
enough to clear the front of the frame. The engine was tilted by
pushing down on the back of the transmission. |

|
|
|
|
|
| After the engine cleared the front of
the frame, it was lowered in to the engine bay with the lift. The
car was rolled forward to position the engine correctly and then the
engine was lowered into the mounts |
 |
|
|
|
|
| The transmission was not lining up with
its mounts and it needed a little adjustment. |

|
|
|
|
|
| We have no pictures to prove it , but
after connecting most of the wiring, the engine did turn over with the
key. We still need to connect the fuel lines and radiator before
starting the engine. |
 |
|
|
|
|
| One of our big concerns is the fuel
lines and making sure that they are installed correctly. A leak near
the hot exhaust could have serious results. We will eventually swap
out the high pressure rubber lines for some braided steel covered lines
with threaded connections. |
 |
 |
|
|
Home |