|
|
|
|
|
Dashboard Wiring |
| Scary at first, but not too bad when it's over.... | |||
|
The dashboard wiring in the manual needed a few more pictures and explanation. I guess the wiring from different years is a little different and that would make it difficult to document. I have put this together as a resource to other builders. Hopefully it will be helpful. | |||
|
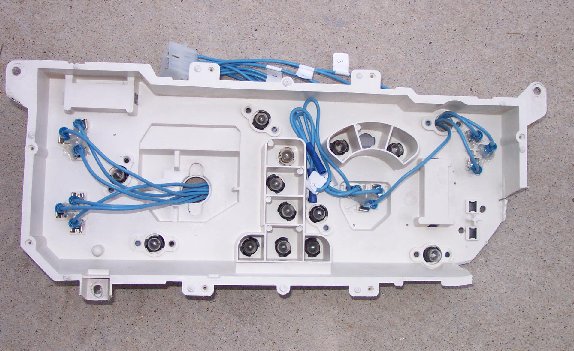
Disassembly of the gauge pod was easy. I then used a hacksaw to cut up the smaller gauges and trim the larger ones. I cut from the back first and then cut the thin face with some scissors. Rather than follow the instructions I ran the pins from the front and hot glued them in place. The wires were then threaded through the existing holes. |
| ||
| I learned a few tricks when wiring the gauges. Each gauges has three wires: ground, 12 volt constant and a sensor wire (except the voltmeter it has no senor wire). To clean up the wiring from the pod you can connect the 5 ground and 12 volt wires together. You can do it with as few as 6 wires, but I used 10 wires. |  | ||
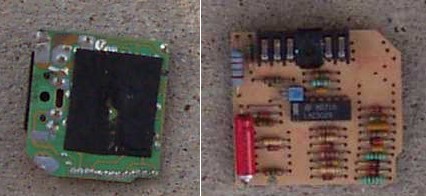
| This is the antislosh module and it connects between the gas tank and the gas gauge. This circuit board keeps the gas gauge from swinging back and forth as you turn or accelerate. It connects to the back of the gauge pod. |  | ||
| I thought the Mustang gauges would look cheap and sloppy, but when you put the trim rings on them they look alright. | |||
| I used a 15 pin Molex connector between the dash and gauge pod. This will allow me to remove the dash without disconnecting the gauge pod. Also I plan to used some small LED's from RadioShack to light the dash. | |||
| This is the back of the speedometer. The red and black wires connect to LED's which will light the gauges. The LED's were hot glued into holes drilled into the clear plastic gauge. | |||
| Here the dash installed for a test fit. If you look closely you can see where we have marked where to drill for indicator lights and additional switches. The wiring is a bit of a mess, but we should be able to clean it up with some tie wraps in the final installation |  |
 | |
| Here is the dash with indicator lights installed as well as the turn signal switch. We still need to wire the headlight switch and the ignition. The interior is very small and sometimes you have to get creative to reach things under the dash. |  |
 | |
| The purpose of most of the dash wiring is for lights. So in order to test out our work we had to go for a little night drive. |  |
 | |
| Here is the dash covered with vinyl and the gauges installed. We have added a second green light for right and left turn signals. Also we have a red and amber light for the check engine and battery charge. |  | ||
| The dash is now in the car with the rest of the switches installed. We used brackets for the stock switches as dash supports along the bottom edge. |  |
||